External graphics card experiment: Part 1

I always wanted to have a small light portable computer on the go and when I get home to use a docking station and get the full desktop experience. Following other people examples on the internet I have made this cheap solution with and external graphics card in the docking station (eGPU) that can be used with an external monitor or accelerate the internal screen of the laptop.
Parts
Disclaimer
This post contains links to Amazon where I get a small commission if you purchase anything after clicking on these links - at no extra cost to you! But only if you have explicitly consented to this. I have purchased all the mentioned products myself and I only link to products that I believe are the best for my readers. If you want to help out even more, take a look here.- Laptop with thunderbolt port (Lenovo T430s)
- Graphics card (GIGABYTE Nvidia GTX 760) ~ 275 USD
- PCI-E 1x to ExpressCard adapter PE4L-EC060) ~ 70 USD + 22 USD postal fees
- Sonnet Echo Express Thunderbolt Adapter Pro ~ 120 USD
- Thunderbolt cable ~ 55 USD
- ATX power supply ~ 73 USD
- Case ~ 75 USD
That is 415 USD for the setup without the laptop and graphics card and 690 USD with the graphics card included. Notice all prices are in USD but I live in Denmark so prices are higher than the states.
Setup
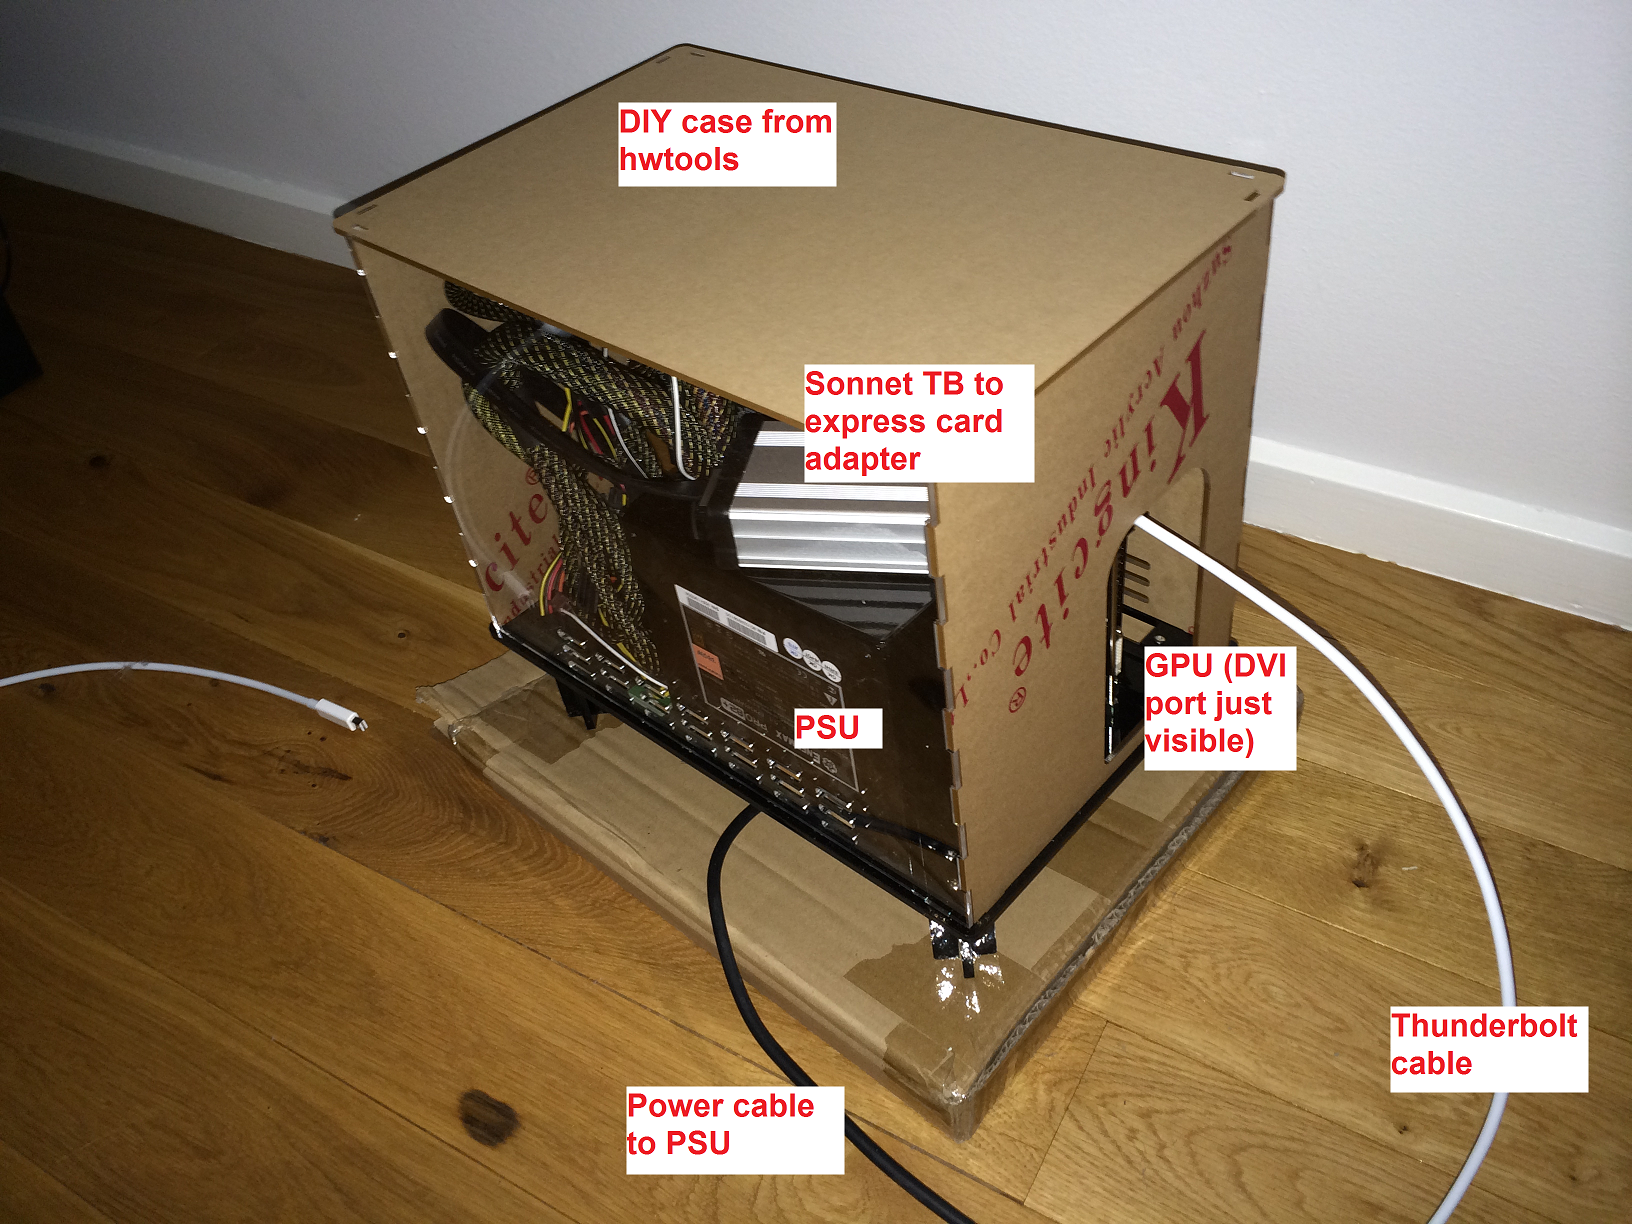
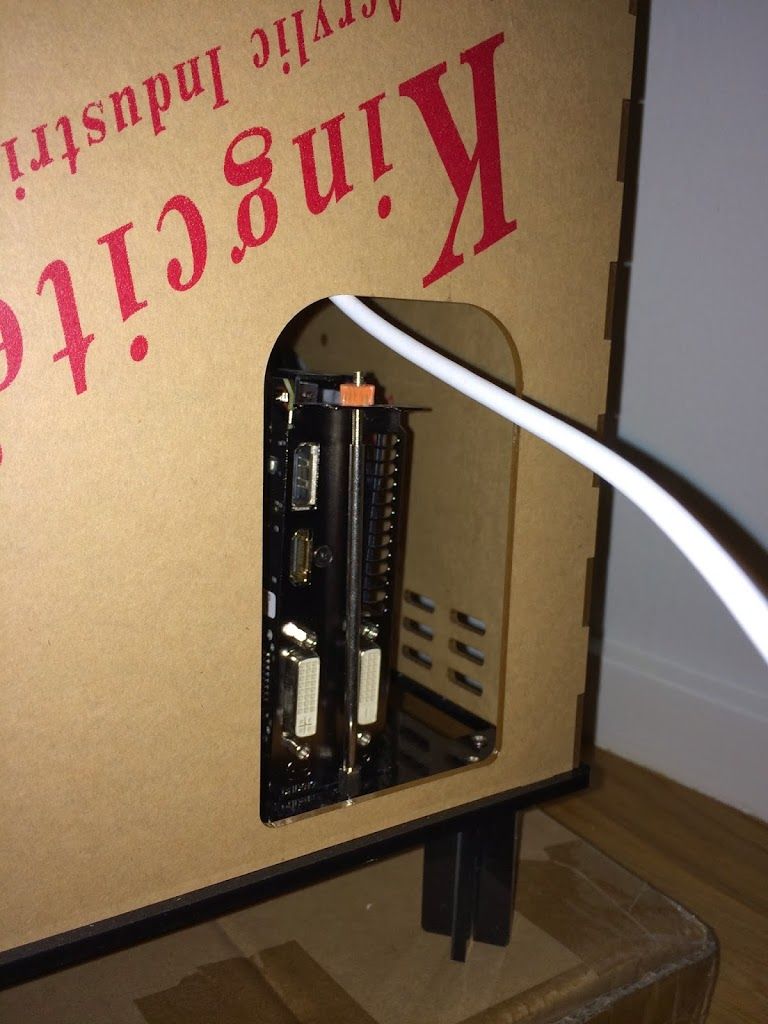
My laptop is connected via thunderbolt to the Sonnet Echo Thunderbolt to ExpressCard adapter which is connected to the PCI-E 1x ExpressCard adapter. I connect the graphics card to this PCI-E 1x port, the power supply unit and case.


The setup is configured to start when the laptop start or wakes from sleep and turns off when the computer turns off. I have installed windows 7 64 bit. I have not used any bootloaders, memory reallocation or third-party tools like described here. Maybe it is because I don’t use MacBook in combination with bootcamp. My laptop does not contain a discrete graphics card which might have helped me avoid PCI memory allocation problems. When I plugin the cable it detects my graphic card and I install the drivers.
Performance
There are two ways of using the setup, one is to display the content on an external monitor connected to the graphic card. Another is to accelerate the laptops internal monitor, I give you performance measurements for both:
3dMark 6
- 21028 with NVIDIA GeForce GTX 760(1x) and Intel Core i7-3520M (external monitor
- 18829 with NVIDIA GeForce GTX 760(1x) and Intel Core i7-3520M (internal laptop screen)
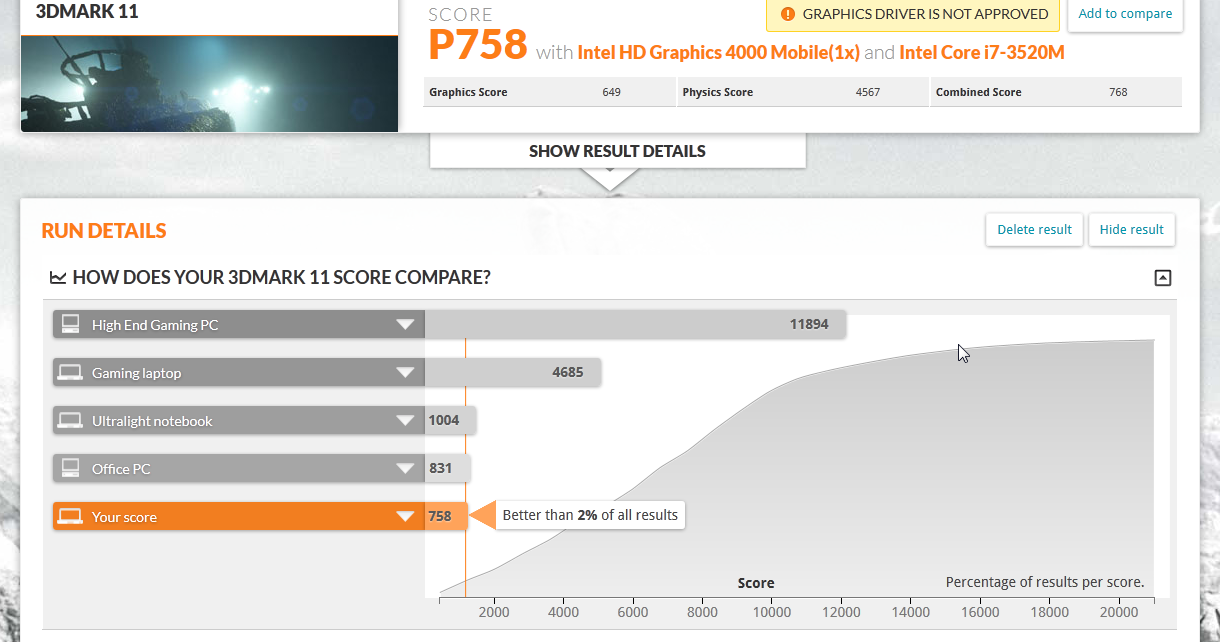
- 6678 with Intel HD Graphics 4000 Mobile(1x) and Intel Core i7-3520M (internal laptop screen)
Looking at the first part of the test I saw these framerates:
- GeForce GTX 760 (external monitor) 160 fps
- GeForce GTX 760 (internal laptop monitor) 100 fps
- Intel HD Graphics 4000 Mobile (internal laptop monitor) 30 fps
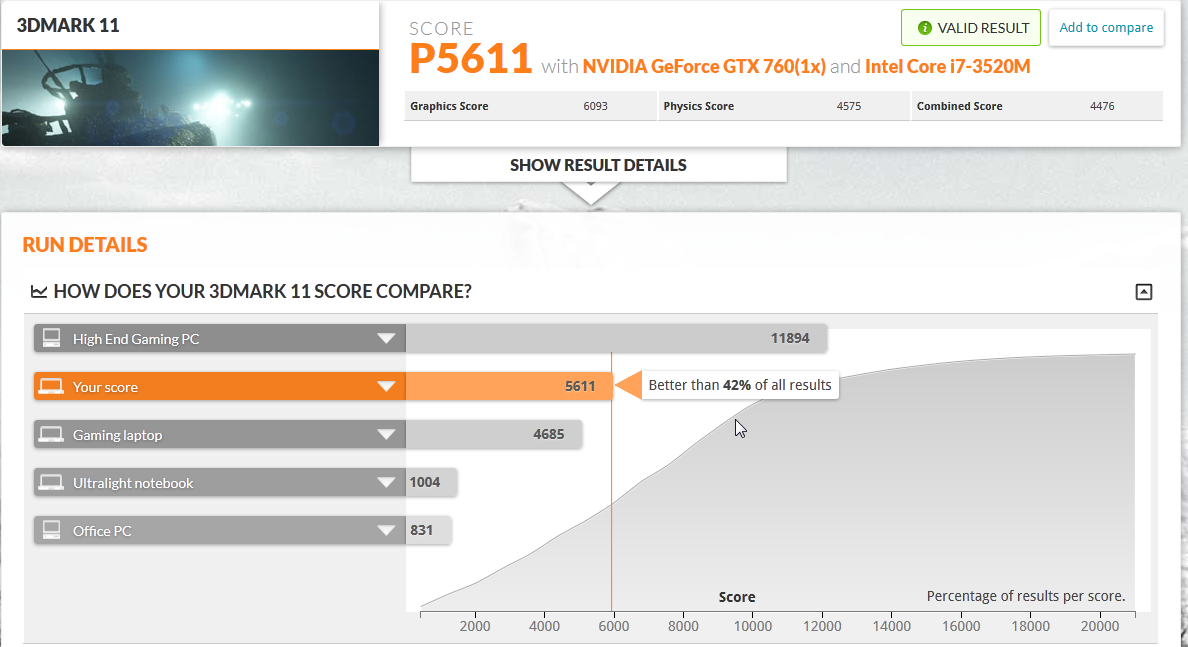
3dMark11


I did not take a screenshot of the test using the internal laptop screen and the external graphics card, but the score was 4400.
Scaling
Using an ExpressCard adapter halves the bandwidth of thunderbolt 1, so the effective bandwidth is PCI-E 2.0 x1. This does slow down the graphics performance, but not as much as you might think:
http://www.techpowerup.com/reviews/Intel/Ivy_Bridge_PCI-Express_Scaling/1.html
Using a laptop with the new thunderbolt 2 port and a setup that support this thunderbolt port, like enclosures from Sonnet or Magma, would have a bandwidth of PCI-E 2.0 x4, four times as much, but not four times the performance. See my post about my thunderbolt 2 setup here.
Conclusion
I have succeeded in building a setup that is close to giving my the full desktop experience, with some performance limitations. Why not just buy a desktop pc on the side? Well I still only want a single computer, not two, even if the performance is reduced. Next project however is getting a laptop with two thunderbolt 2 ports (MacBook Pro retina 13 inch) and Sonnet Echo Express SE II so I can enjoy the full PCI-E 2.0 x4 speed and with a possibility to use two graphics card if I use PCI-E risers and an external power supply. Corning has just released 33 feet optical thunderbolt cables which enables all the noisy hardware to be further away from me. But that is another blog post when the money is there
UPDATE 08-01-2014: Added pictures of the setup
UPDATE 25-05-2014: Upgraded the setup to thunderbolt 2, see my post here
Enjoyed this content?
Help keep it free by sending a donation. You can also subscribe to various site feeds to get notified of new posts, follow me on social media, and more.