ESP8266 Controlling an IHC wireless light switch

Recently I installed several intelligent IHC Wireless lightswitches and power outlets from Lauritz Knudsen. They can be programmed so that any switch can wirelessly control any other switch or power outlet. I wanted to control these switches using my phone and was left with three options
- Buy an IHC Wireless Controller for around $750 and try to integrate an ESP8266 to control the switches
- Try to hack the proprietary IHC Wireless protocol and send the commands directly to the switches using an ESP8266 and a radio transceiver module
- Modify an IHC Wireless switch so that an ESP8266 can control the buttons directly
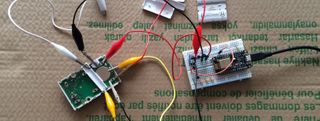
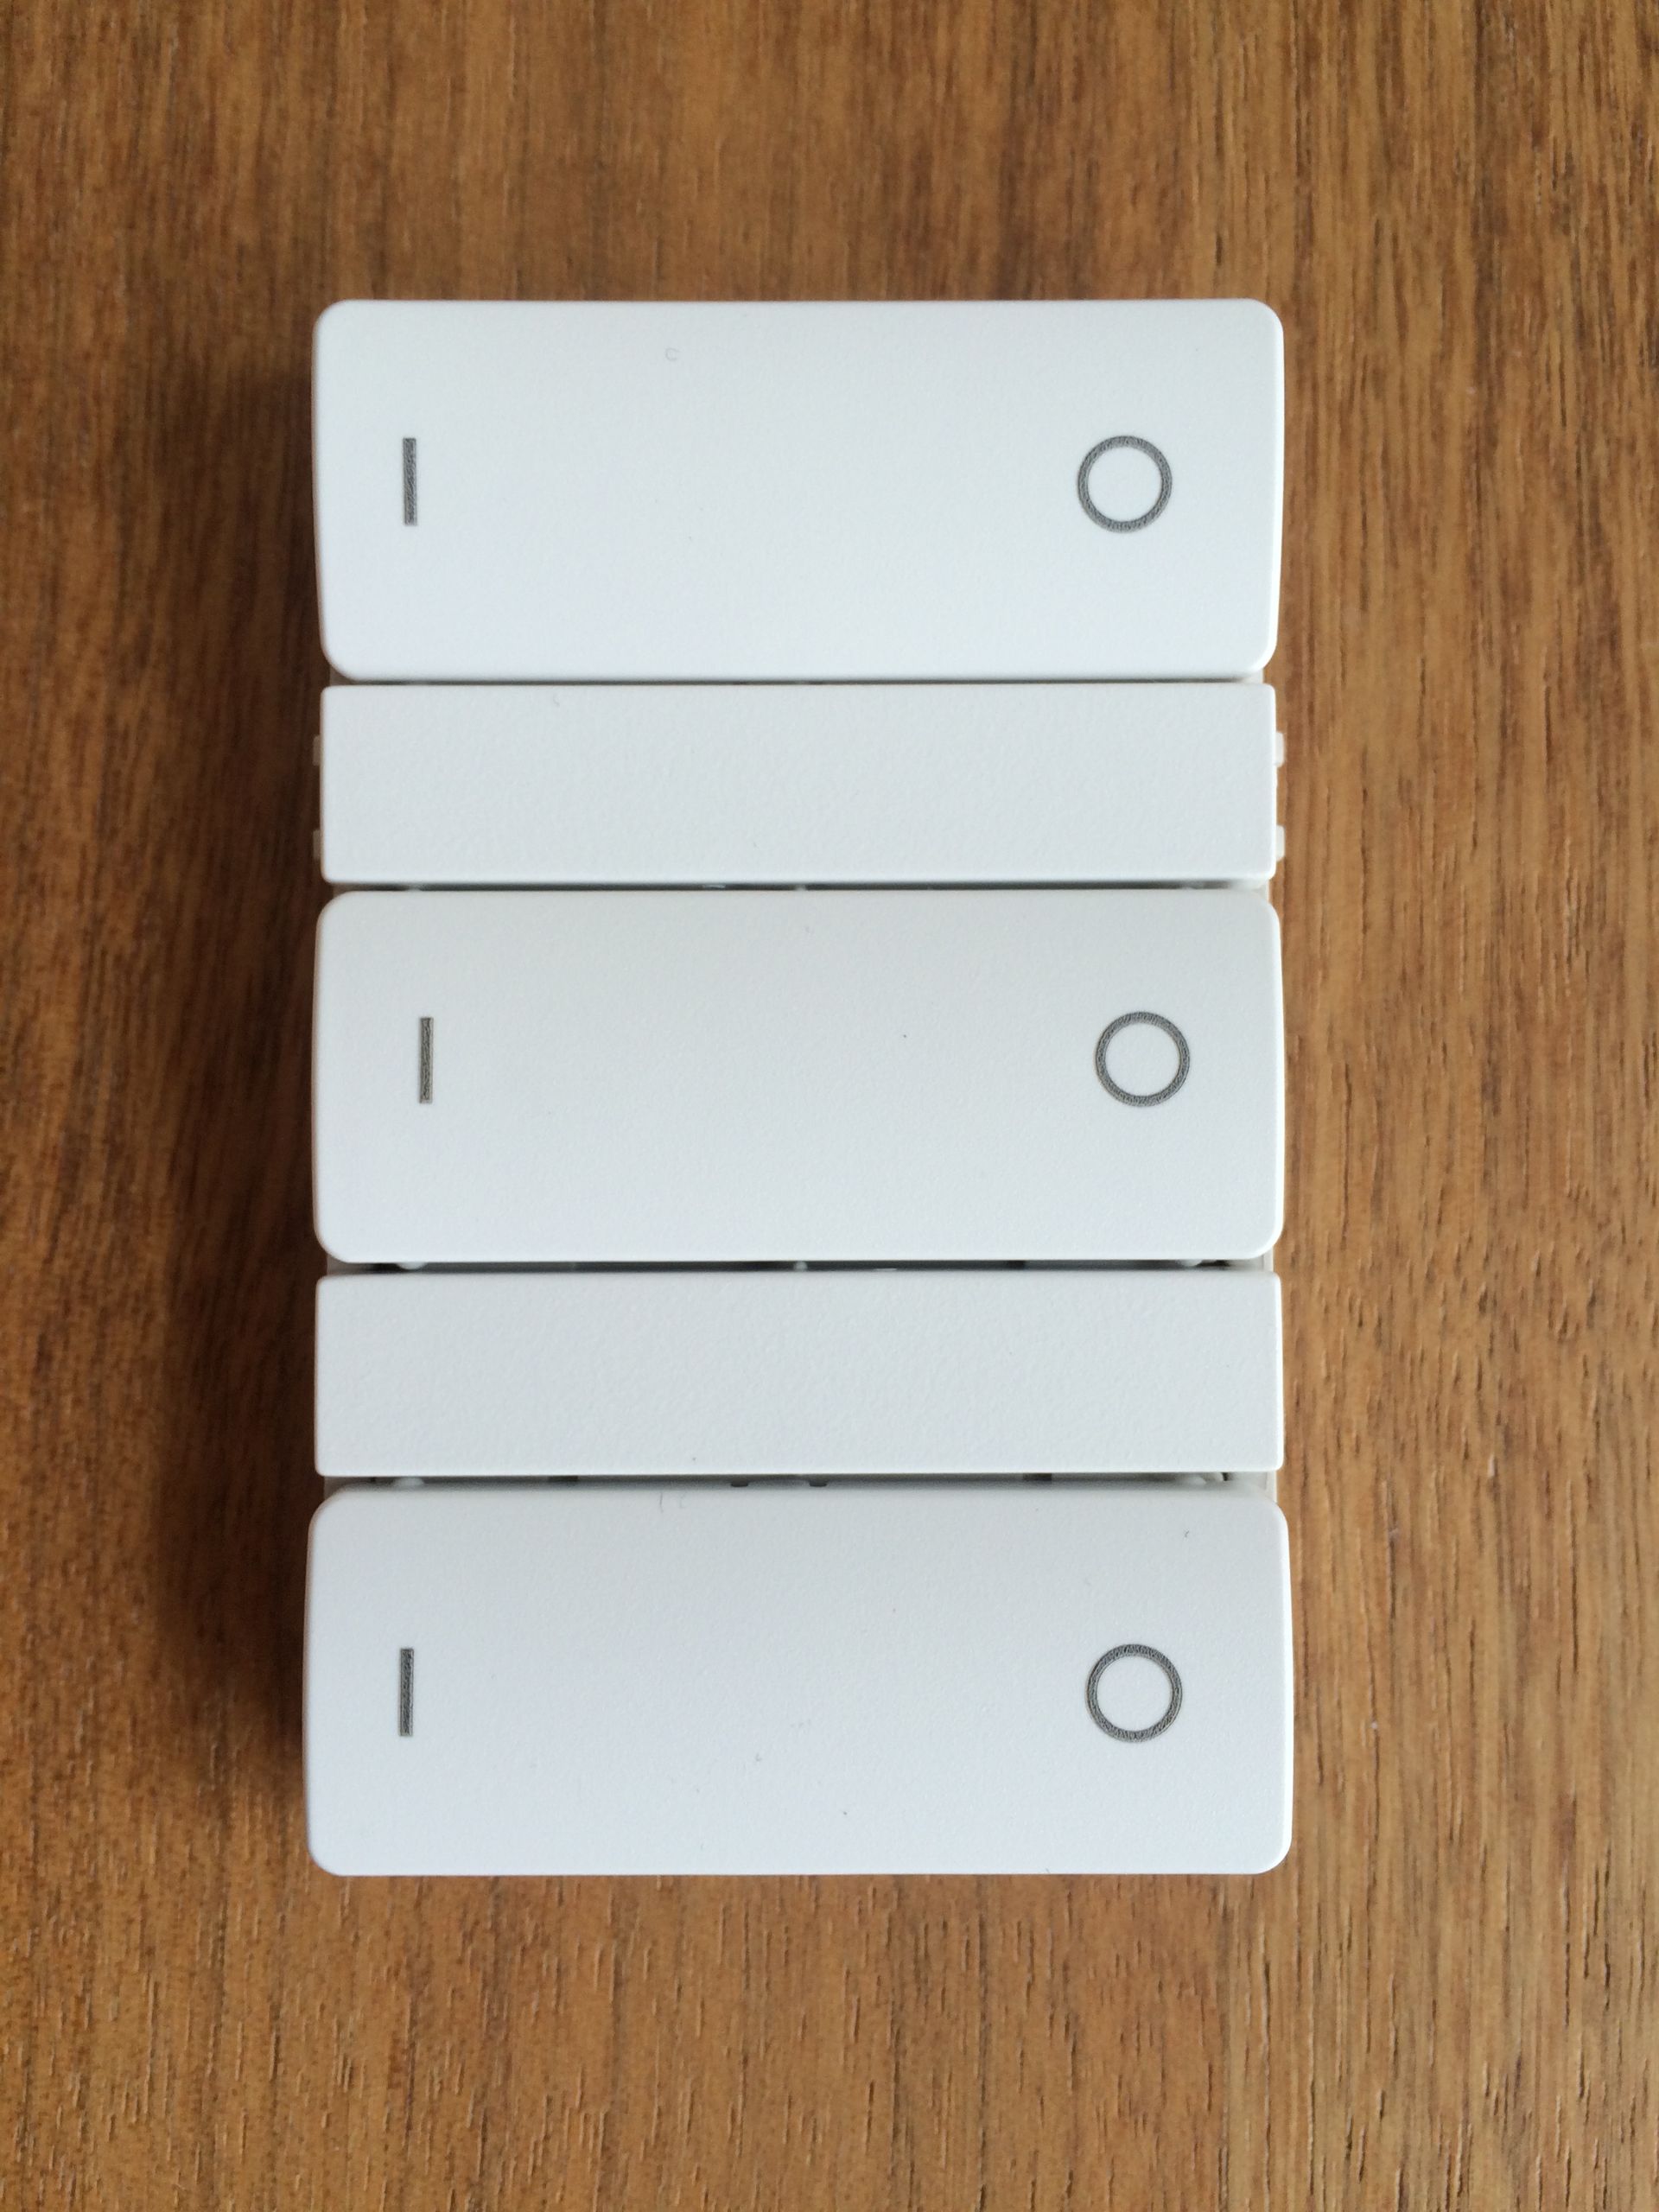
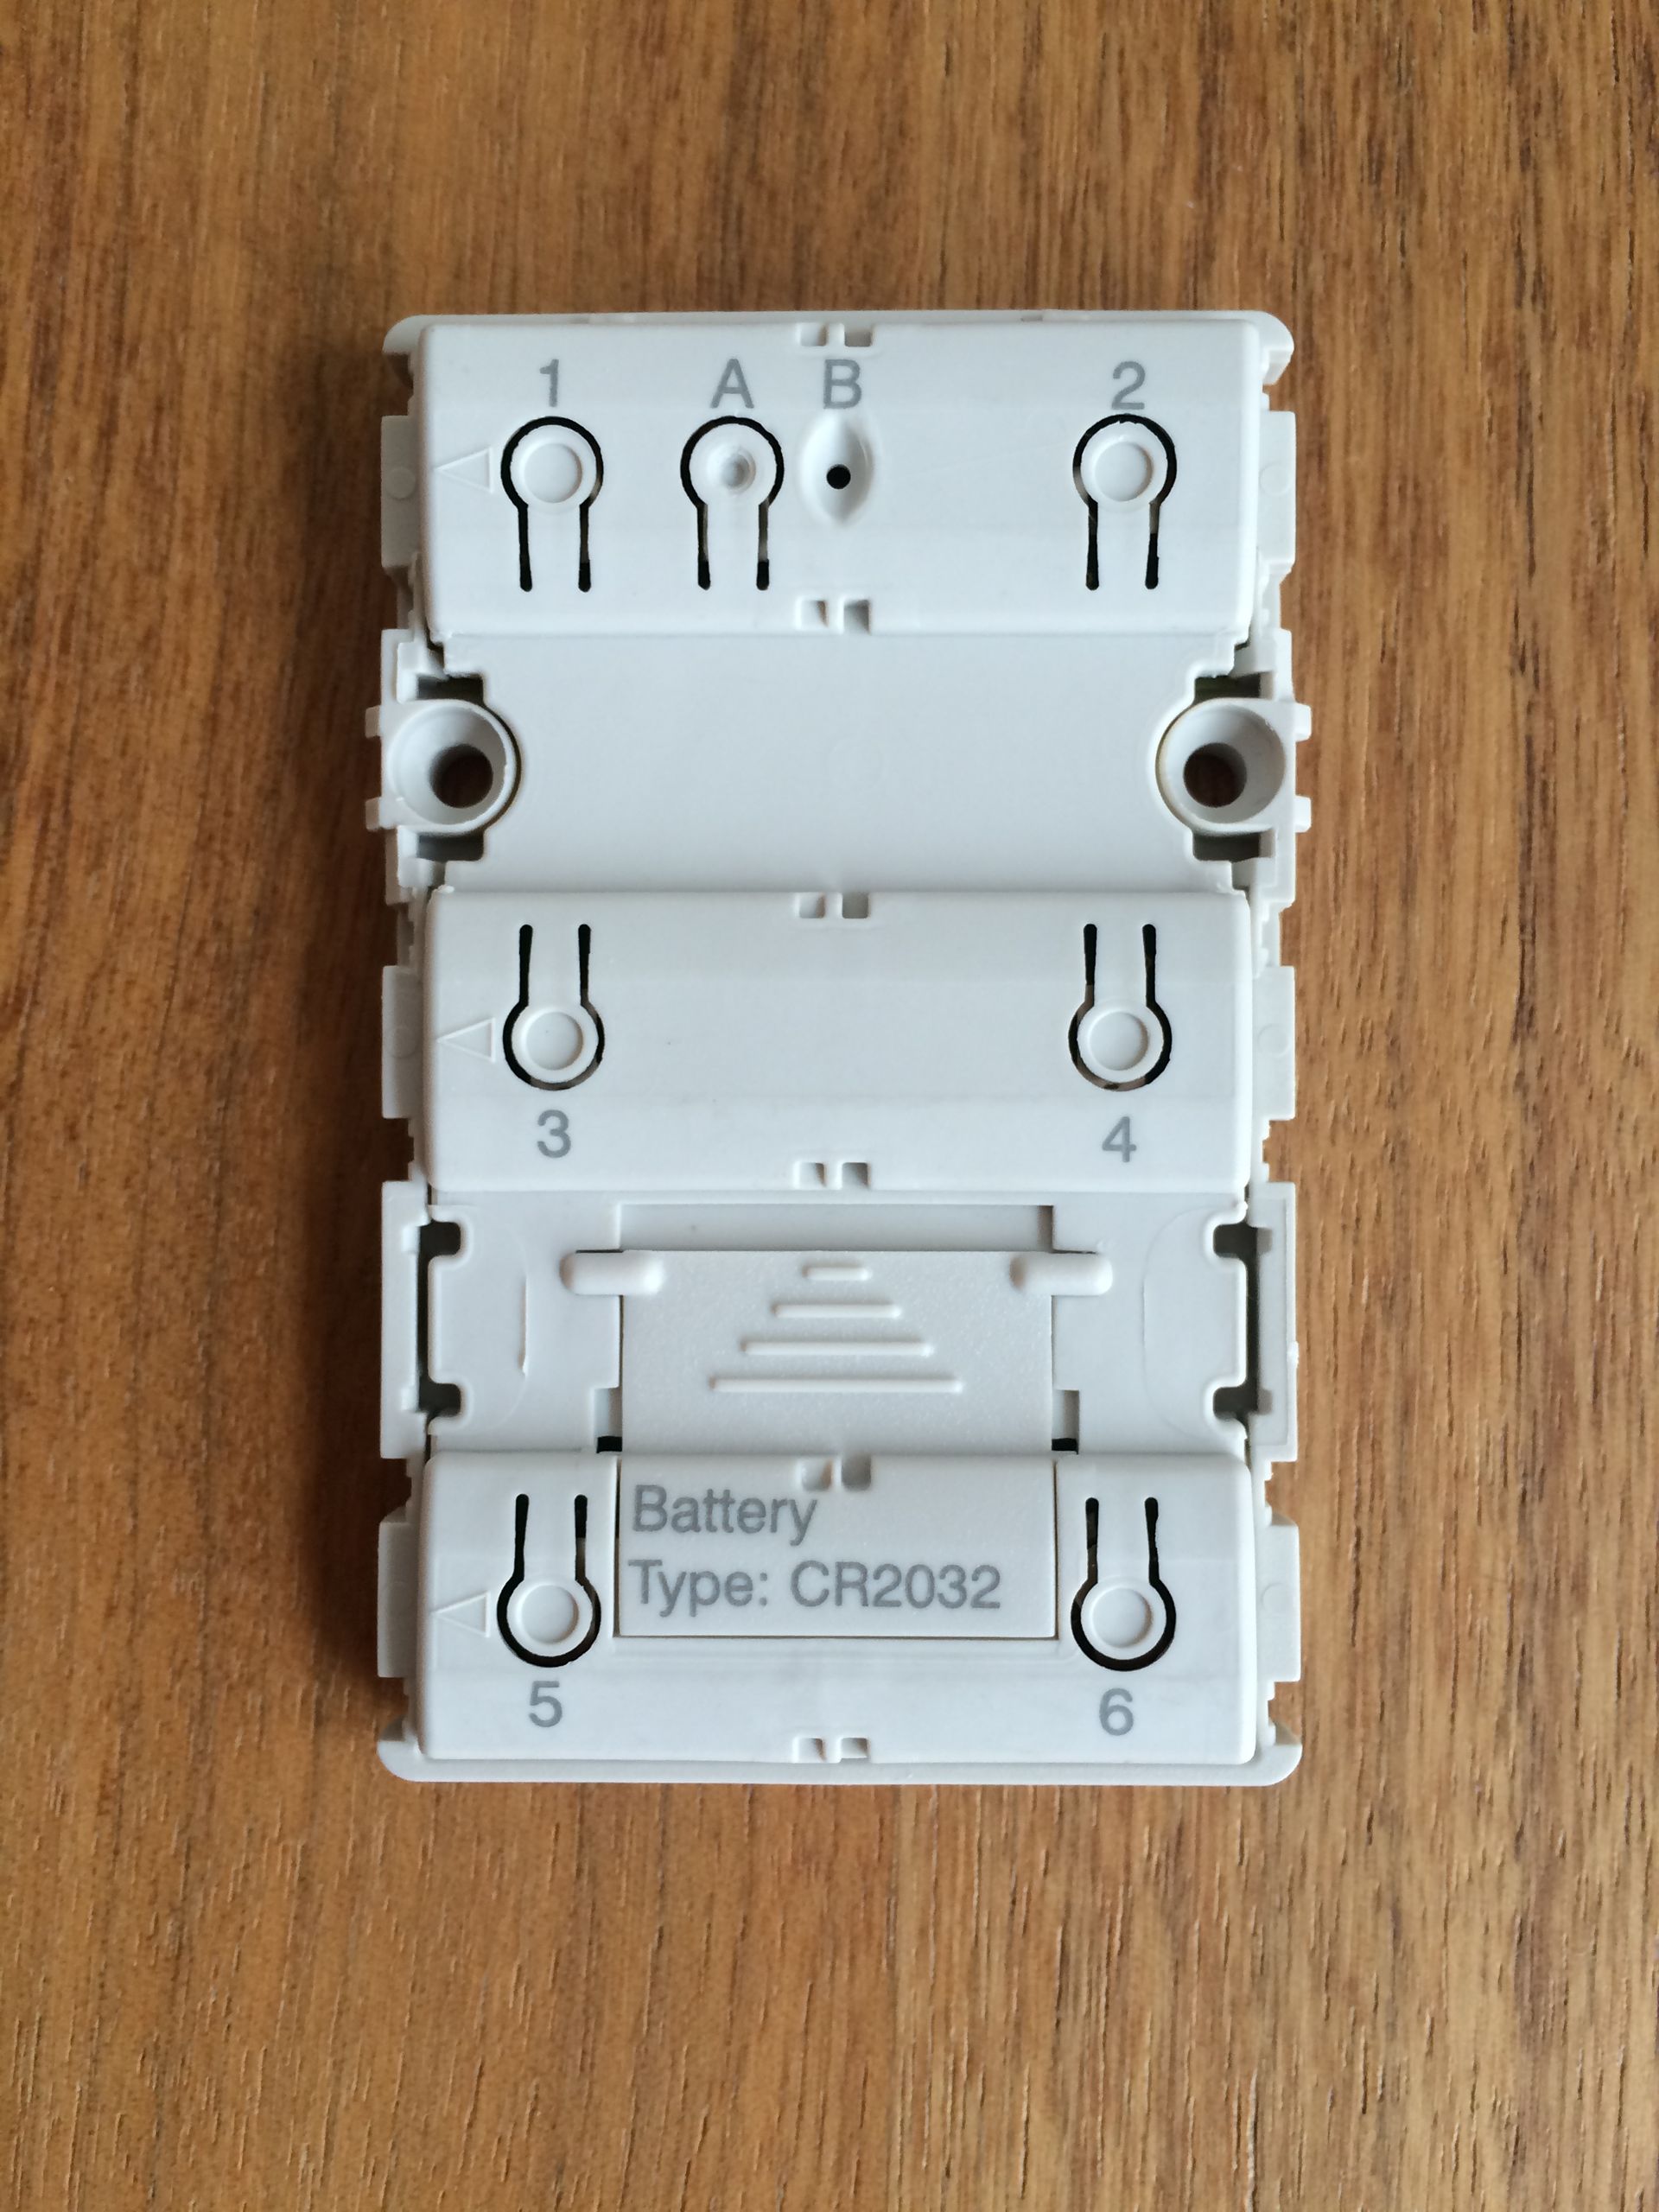
Option 1 is too expensive for what I want to do and as far as I know nobody has been able to hack the protocol in option 2. So that left option 3! I bought a battery powered IHC Wireless switch with a total of 7 buttons. Each lightswitch has one on and one off button. The last button is used to program the switch. This was the cheapest option at around $75. Next I took the switch apart and saw it was a simple matter to activate the 7 small buttons.

Next I hooked up and ESP8266 development board, a few BC547B transistors, 10K resistors and wires and that was it for the hardware setup.
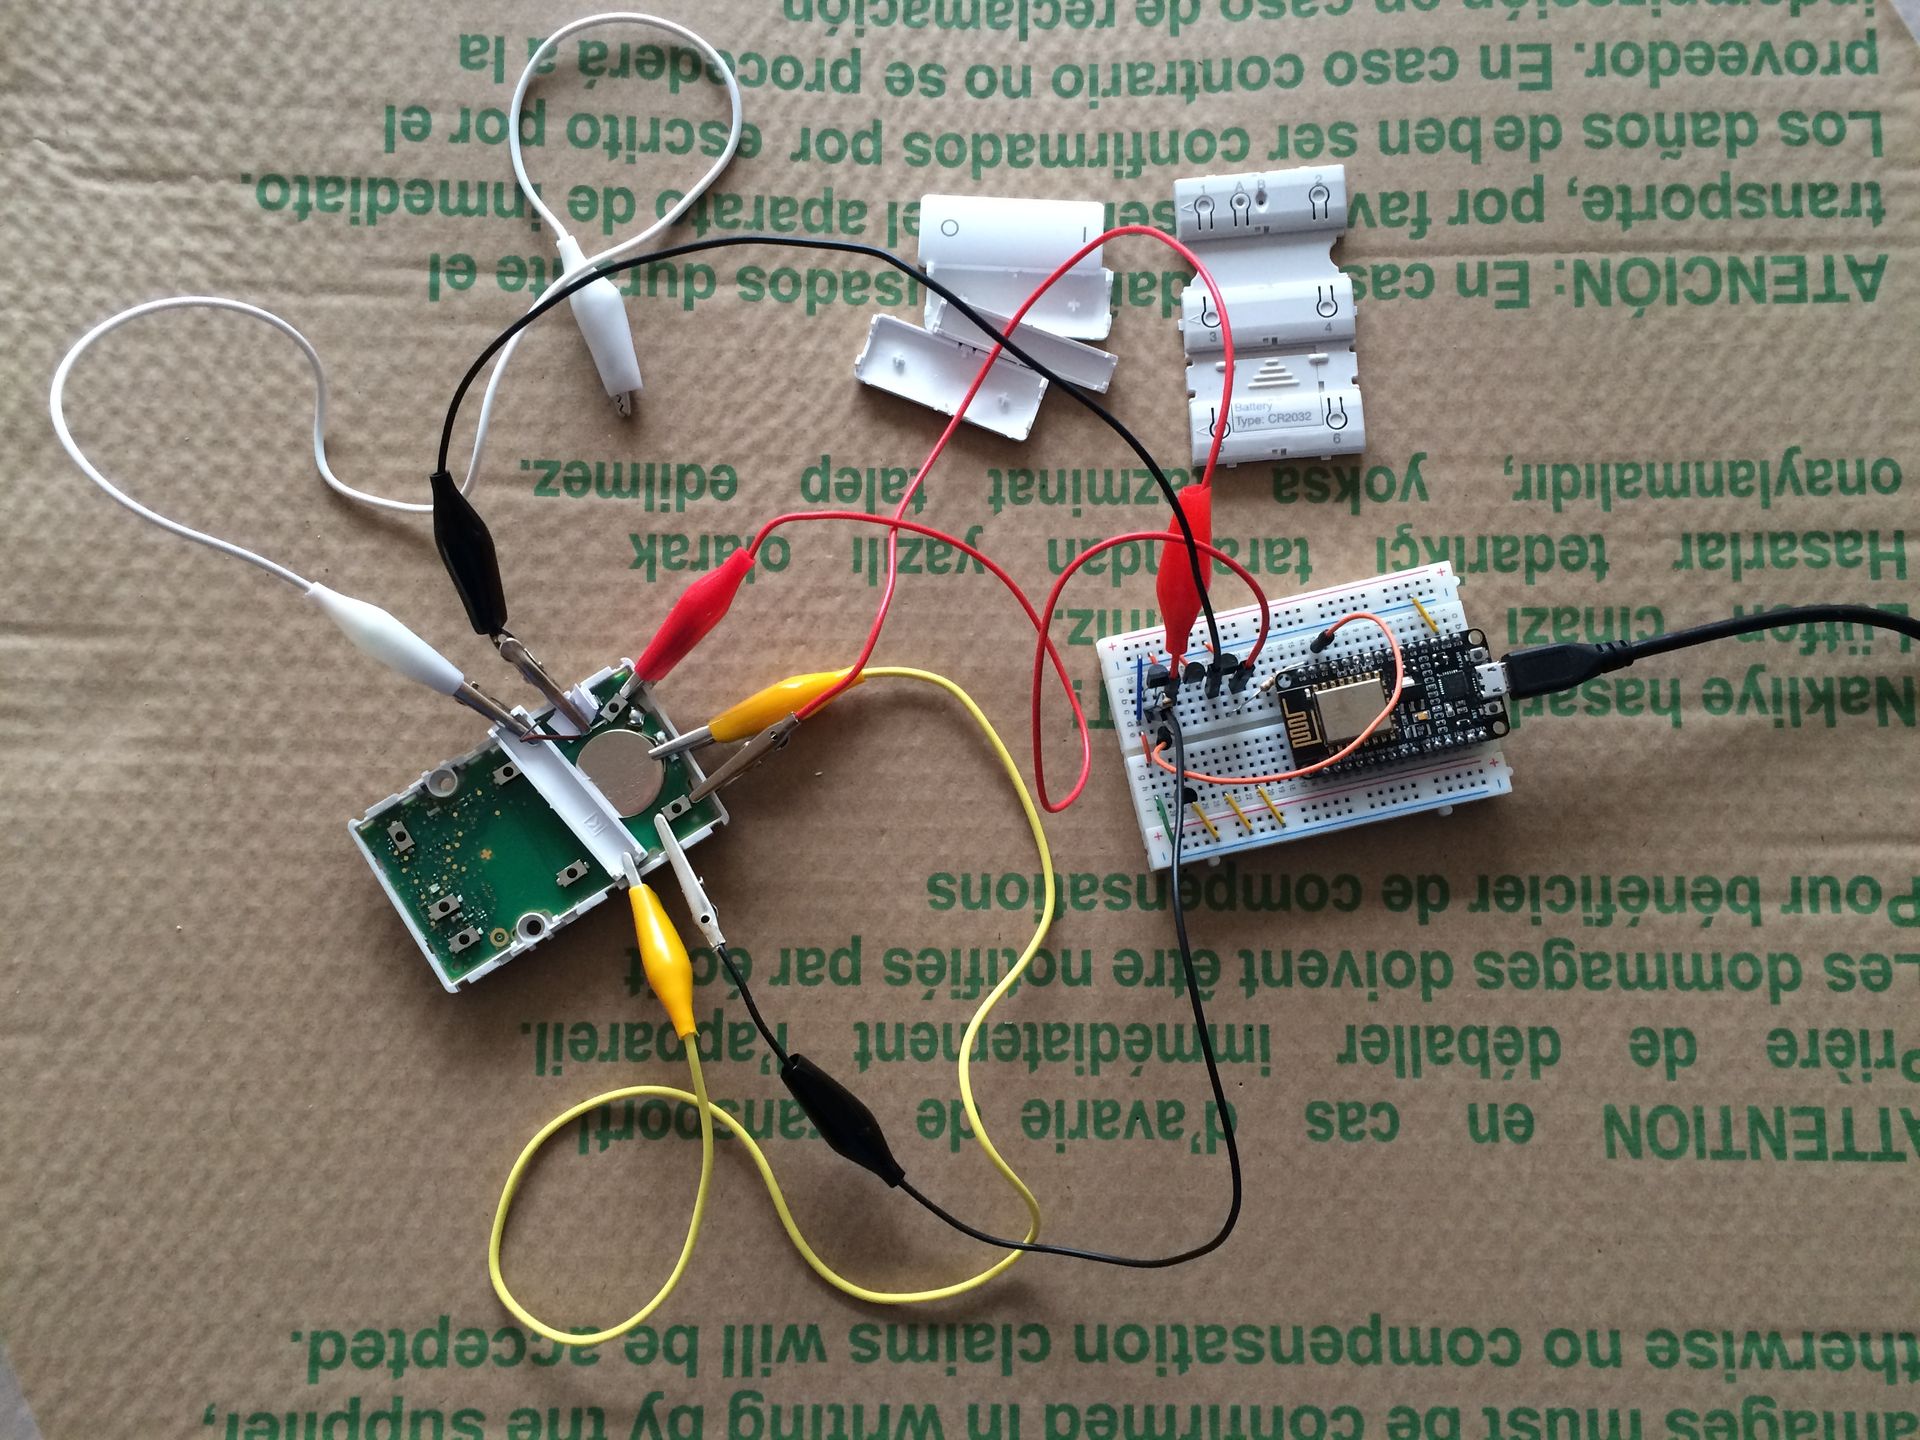
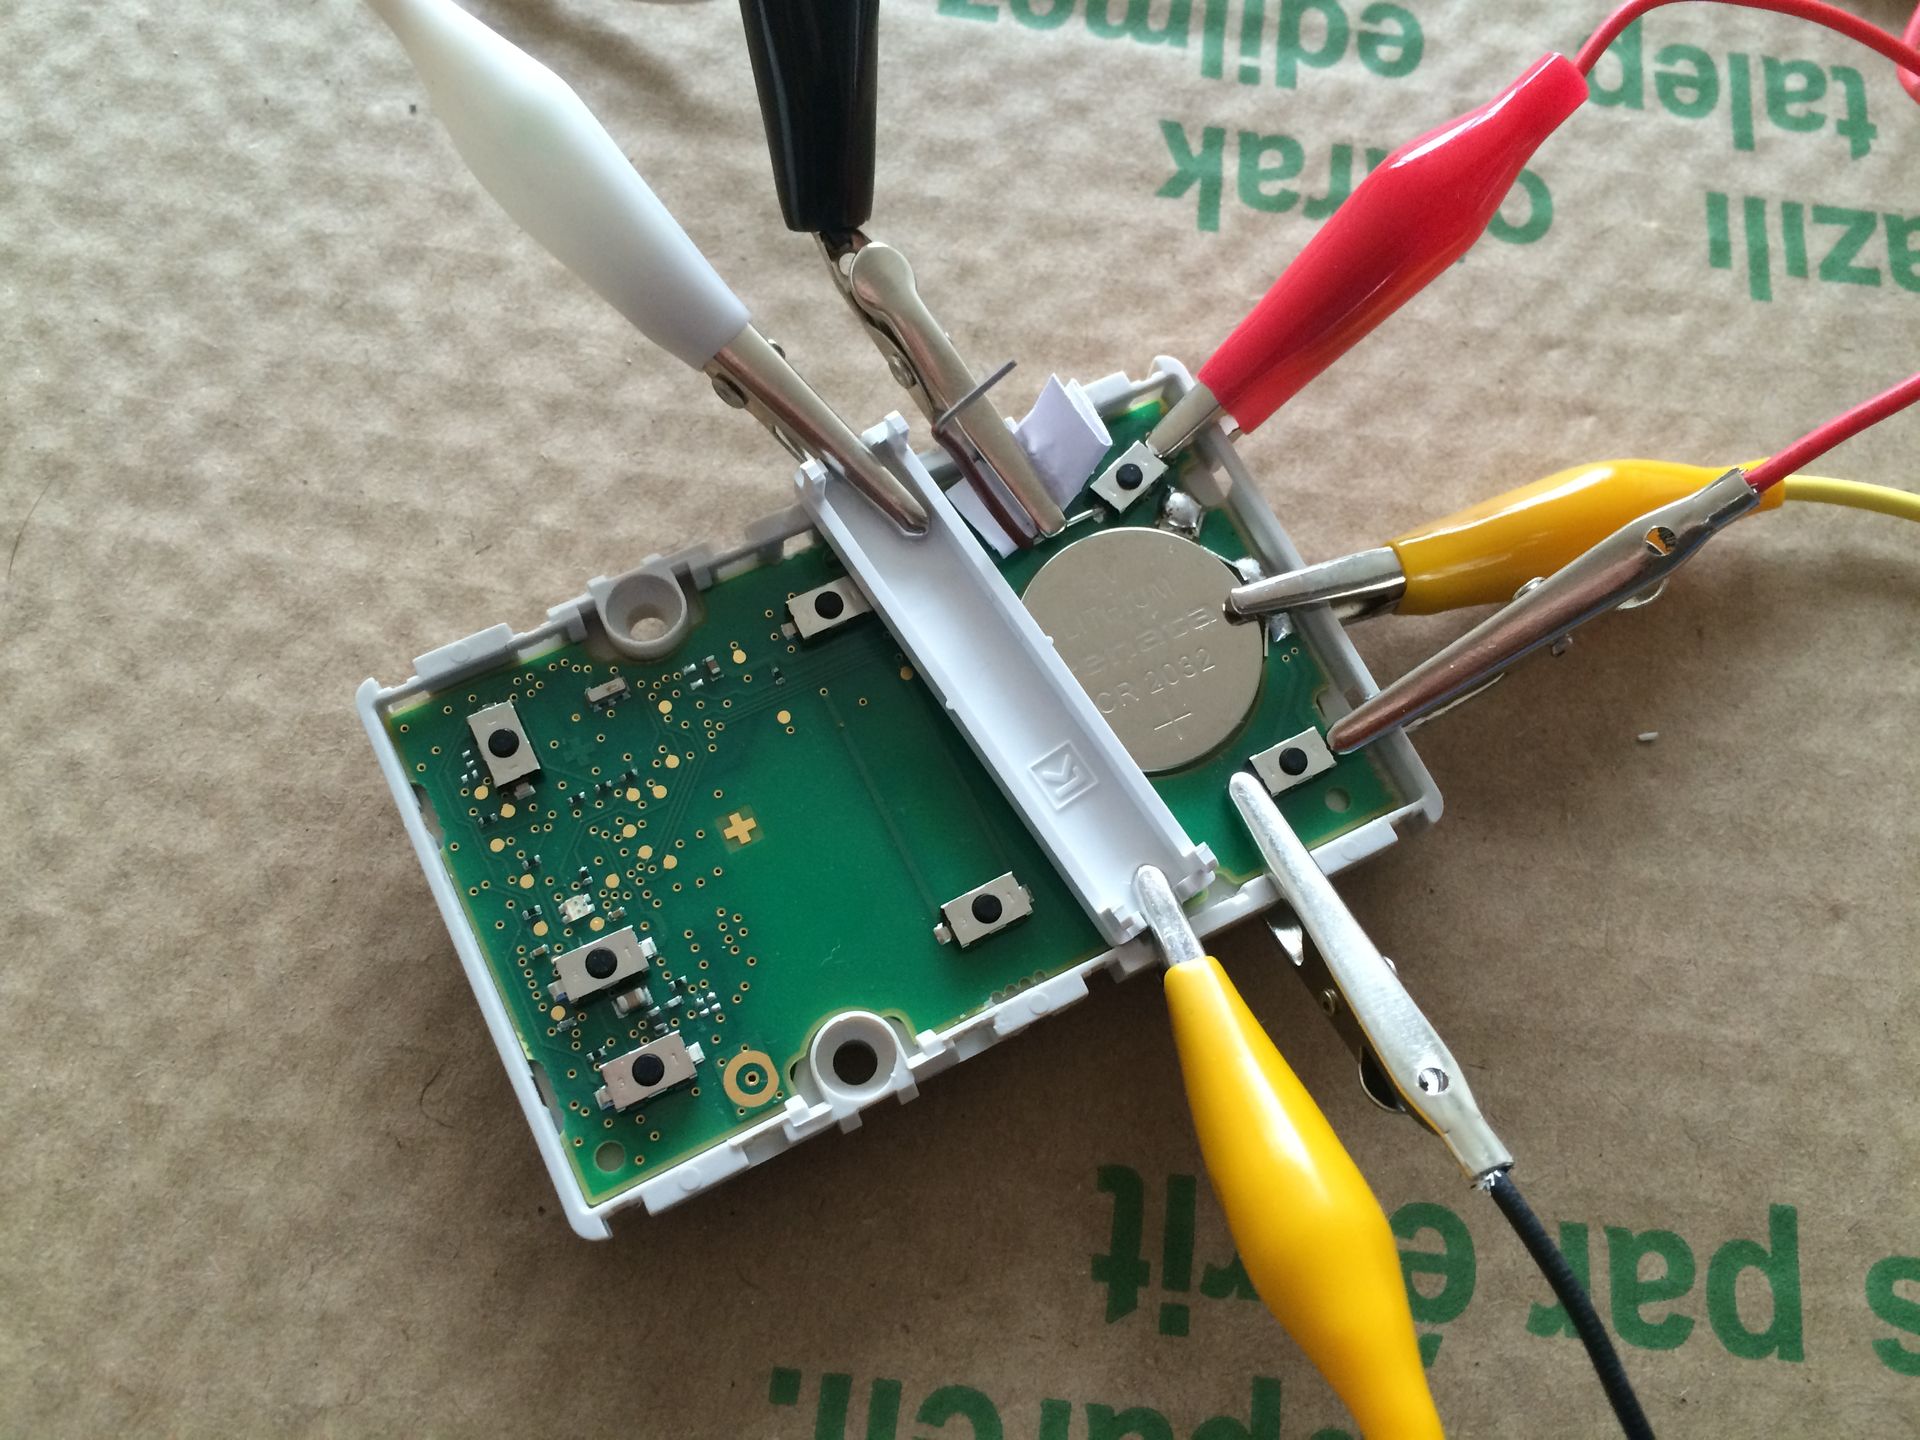
Notice that I have only hooked up two buttons, but the webserver supports up to 7 buttons
Parts
If you don’t mind waiting a few weeks I would recommend buying from AliExpress as I have done for the lowest price and free shipping, even to Europe! I cannot recommend Amazon for parts like these since they are very expensive even with free shipping from Amazon Prime. I have created a table to compare the prices so that people can make up their own mind.
Disclaimer
This post contains links to Amazon where I get a small commission if you purchase anything after clicking on these links - at no extra cost to you! But only if you have explicitly consented to this. I have purchased all the mentioned products myself and I only link to products that I believe are the best for my readers. If you want to help out even more, take a look here.| Part | Ali Express | Amazon |
|---|---|---|
| 1x ESP8266 development board | $4.2 | $9 |
| 1x IHC Wireless switch | N/A | N/A |
| 1x breadboard | $1.2 | $5.2 |
| 1-7x 10K resistor (one for each button you want to control) | $0.7 | $4.9 |
| 1-7x BC547B transistor (one for each button you want to control) | $1.1 | $5.5 |
| Various breadboard wires | $2.6 | $5.9 |
| Total | $84.8 | $105.5 |
| Total without IHC Wireless switch | $9.8 | $30.5 |
Hardware setup
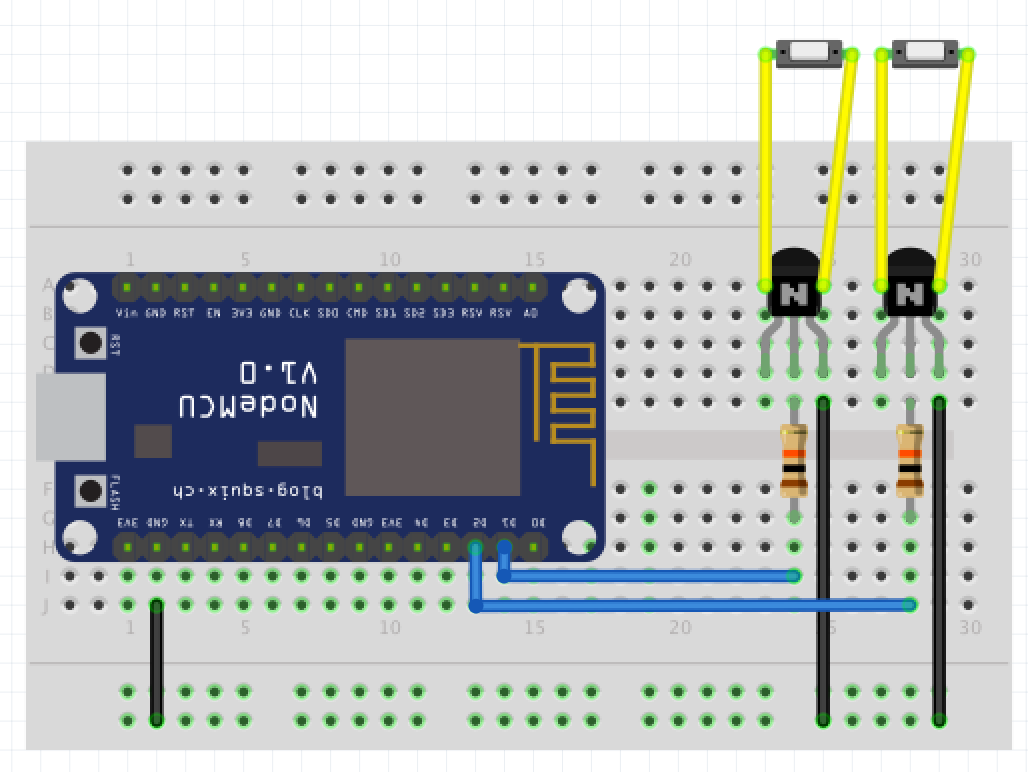
The two buttons connected by the yellow wires are from the IHC Wireless switch. Other than that the setup is straight forward.
Code
Upload the following code as init.lua to your ESP8266. If you don’t know how, take a look at my post here. The most important parameters to configure are:
switch*_pin: Map up to 7 switches to the GPIO of the ESP8266wifi_SSID: Wifi namewifi_password: Wifi passwordclient_*: Optionally set a static ip address, netmask and gateway. Ifclient_ipis not set, DHCP will be used
1
2
3
4
5
6
7
8
9
10
11
12
13
14
15
16
17
18
19
20
21
22
23
24
25
26
27
28
29
30
31
32
33
34
35
36
37
38
39
40
41
42
43
44
45
46
47
48
49
50
51
52
53
54
55
56
57
58
59
60
61
62
63
64
65
66
67
68
69
70
71
72
73
74
75
76
77
78
79
80
81
82
83
84
85
86
87
88
89
90
91
92
93
94
95
96
97
98
99
100
101
102
103
104
105
106
107
108
109
110
111
112
113
114
115
116
117
118
119
120
121
122
123
124
125
126
127
128
129
130
131
132
133
134
135
136
137
138
139
140
141
142
143
144
145
146
147
148
149
150
151
-- Webserver to control several on / off switches.
-- Idea inspired by: https://www.youtube.com/watch?v=DPVmGG4xifU
-- HTML inspired by: https://github.com/mrkale/NodeMCU-WifiDoubleSwitch

-- Config
switch1_pin = 2 -- Room 1 On
switch2_pin = 1 -- Room 1 Off
switch3_pin = 3 -- Room 2 On
switch4_pin = 3 -- Room 2 Off
switch5_pin = 3 -- Room 3 On
switch6_pin = 3 -- Room 3 Off
switch7_pin = 3 -- Programmable switch

--- WIFI ---
wifi_SSID = "wifi_name"
wifi_password = "wifi_password"
-- wifi.PHYMODE_B 802.11b, More range, Low Transfer rate, More current draw
-- wifi.PHYMODE_G 802.11g, Medium range, Medium transfer rate, Medium current draw
-- wifi.PHYMODE_N 802.11n, Least range, Fast transfer rate, Least current draw
wifi_signal_mode = wifi.PHYMODE_N
-- If the settings below are filled out then the module connects
-- using a static ip address which is faster than DHCP and
-- better for battery life. Blank "" will use DHCP.
-- My own tests show around 1-2 seconds with static ip
-- and 4+ seconds for DHCP
client_ip="192.168.1.111"
client_netmask="255.255.255.0"
client_gateway="192.168.1.1"

-- Connect to the wifi network
wifi.setmode(wifi.STATION)
wifi.setphymode(wifi_signal_mode)
wifi.sta.config(wifi_SSID, wifi_password)
wifi.sta.connect()
if client_ip ~= "" then
    wifi.sta.setip({ip=client_ip,netmask=client_netmask,gateway=client_gateway})
end

-- Connect
tmr.alarm(0, 1000, 1, function()
   if wifi.sta.getip() == nil then
      print("Connecting to AP...\n")
   else
      ip, nm, gw=wifi.sta.getip()
      print("IP address: ",ip)
      tmr.stop(0)

      gpio.mode(switch1_pin, gpio.OUTPUT)
      gpio.mode(switch2_pin, gpio.OUTPUT)
      gpio.mode(switch3_pin, gpio.OUTPUT)
      gpio.mode(switch4_pin, gpio.OUTPUT)
      gpio.mode(switch5_pin, gpio.OUTPUT)
      gpio.mode(switch6_pin, gpio.OUTPUT)
      gpio.mode(switch7_pin, gpio.OUTPUT)
      tmr.start(1)
   end
end)

tmr.alarm(1, 100, 1, function()
    gpio.write(switch1_pin, gpio.LOW)
    gpio.write(switch2_pin, gpio.LOW)
    gpio.write(switch3_pin, gpio.LOW)
    gpio.write(switch4_pin, gpio.LOW)
    gpio.write(switch5_pin, gpio.LOW)
    gpio.write(switch6_pin, gpio.LOW)
    gpio.write(switch7_pin, gpio.LOW)
    tmr.stop(1)
end)

-- Start a simple http server
srv=net.createServer(net.TCP)

srv:listen(80,function(conn)
  conn:on("receive",function(conn,request)
    -- https://github.com/marcoskirsch/nodemcu-httpserver/issues/36#issuecomment-167442461
    -- Some browsers send the POST data in multiple chunks, like Safari on OS X and IOS
    -- Collect data packets until the size of HTTP body meets the Content-Length stated in header
    -- This fixed issues where the webpage was rendered twice after posting data to the server in some browsers
    if request:find("Content%-Length:") or bBodyMissing then
       if fullPayload then fullPayload = fullPayload .. request else fullPayload = request end
       if (tonumber(string.match(fullPayload, "%d+", fullPayload:find("Content%-Length:")+16)) > #fullPayload:sub(fullPayload:find("\r\n\r\n", 1, true)+4, #fullPayload)) then
          bBodyMissing = true
          return
       else
          print("HTTP packet assembled! size: "..#fullPayload)
          request = fullPayload
          fullPayload, bBodyMissing = nil
       end
    end

    -- Handle POST request - switching on and off the various switches
    _, j = string.find(request, 'switch=')
    if j ~= nil then
        command = string.sub(request, j + 1)
        print("Switch "..command.." click")
        gpio.write(tonumber(command), gpio.HIGH)
        tmr.start(1)
    end

    -- Reponse HTTP headers
    conn:send("HTTP/1.1 200 OK\r\n")
    conn:send("Content-Type: text/html\r\n")
    conn:send("Connection: keep-alive\r\n\r\n")

    -- HTML response
    conn:send('<!DOCTYPE html>')
    conn:send('<html lang="en">')
    conn:send(' <head>')
    conn:send('     <meta charset="utf-8" />')
    conn:send('     <title>IHC Wireless</title>')
    conn:send('     <meta http-equiv="X-UA-Compatible" content="IE=edge">')
    conn:send('     <meta name="viewport" content="width=device-width, initial-scale=1">')
    conn:send('     <link rel="stylesheet" href="https://maxcdn.bootstrapcdn.com/bootstrap/3.3.6/css/bootstrap.min.css">')
    conn:send(' </head>')
    conn:send(' <body>')
    conn:send('     <h1 class="hidden-xs text-center">IHC Wireless</h1>')
    conn:send('     <form method="post">')
    conn:send('         <div class="container">')
    conn:send('             <div class="row">')
    conn:send('                 <div class="col-sm-4 col-sm-offset-0">')
    conn:send('                     <h3 class="text-primary text-center">Kitchen</h3>')
    conn:send('                     <button class="btn btn-block btn-lg btn-success" role="button" type="submit" name="switch" value="'..switch1_pin..'">On</>')
    conn:send('                     <button class="btn btn-block btn-lg btn-danger" role="button" type="submit" name="switch" value="'..switch2_pin..'">Off</>')
    conn:send('                 </div>')
    conn:send('                 <div class="col-sm-4 col-sm-offset-0">')
    conn:send('                     <h3 class="text-primary text-center">Living room</h3>')
    conn:send('                     <button class="btn btn-block btn-lg btn-success" role="button" type="submit" name="switch" value="'..switch3_pin..'">On</>')
    conn:send('                     <button class="btn btn-block btn-lg btn-danger" role="button" type="submit" name="switch" value="'..switch4_pin..'">Off</>')
    conn:send('                 </div>')
    conn:send('                 <div class="col-sm-4 col-sm-offset-0">')
    conn:send('                     <h3 class="text-primary text-center">Bedroom</h3>')
    conn:send('                     <button class="btn btn-block btn-lg btn-success" role="button" type="submit" name="switch" value="'..switch5_pin..'">On</>')
    conn:send('                     <button class="btn btn-block btn-lg btn-danger" role="button" type="submit" name="switch" value="'..switch6_pin..'">Off</>')
    conn:send('                 </div>')
    conn:send('             </div>')
    conn:send('             <div class="row">')
    conn:send('                 <div class="col-sm-4 col-sm-offset-4">')
    conn:send('                     <h3 class="text-primary text-center">Setup</h3>')
    conn:send('                     <button class="btn btn-block btn-lg btn-warning" role="button" type="submit" name="switch" value="'..switch7_pin..'">Program</>')
    conn:send('                 </div>')
    conn:send('             </div>')
    conn:send('         </div>')
    conn:send('     </form>')
    conn:send(' </body>')
    conn:send('</html>')
  end)

  conn:on("sent",function(conn)
    conn:close()
  end)
end)
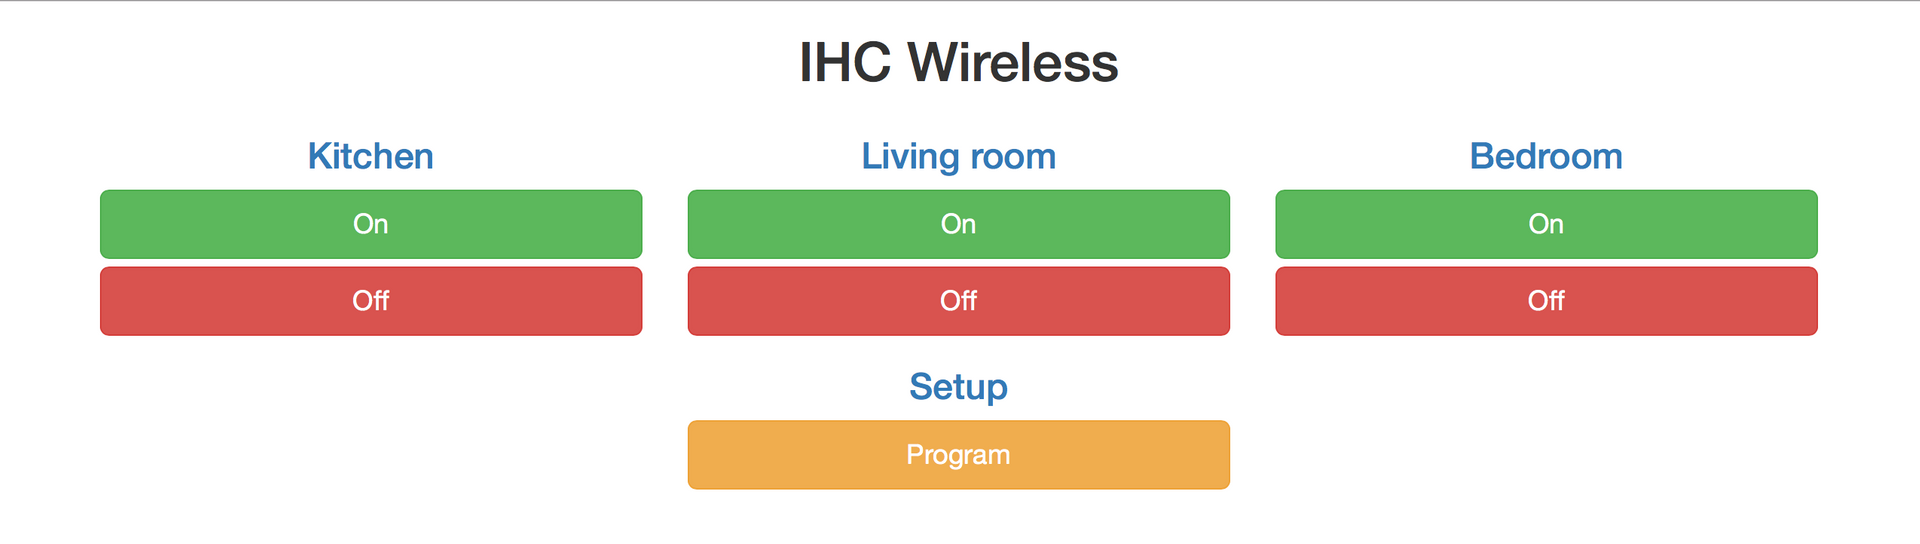
Results
With all connected and up and running, the browser should be accessible from the IP address specified in client_ip or assigned from DHCP. The site is fully responsive so it looks nice on any device.
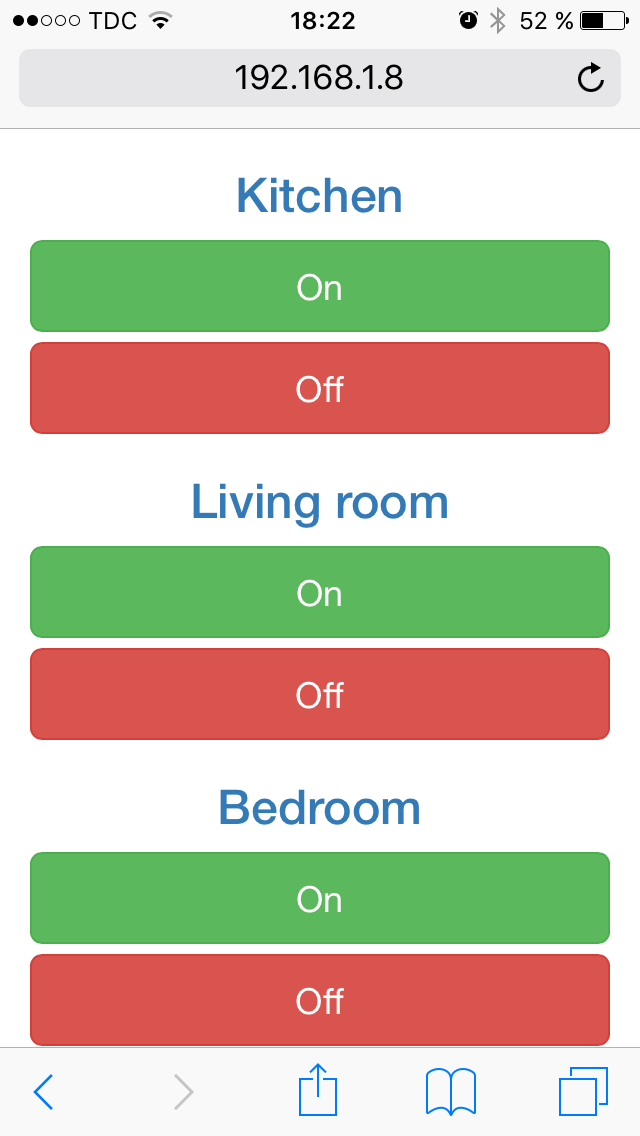
And the most important part, it actually works!
Connecting to the ESP8266 using the serial ports shows the following output:
NodeMCU custom build by frightanic.com
	branch: dev
	commit: 093a895980fbd4ab8b3ebedcd6efe36e26419887
	SSL: true
	modules: node,file,gpio,wifi,net,tmr,adc,mqtt,dht
 	built on: 2015-10-13 18:26
  powered by Lua 5.1.4
> IP address: 	192.168.1.111
Switch 1 click
Switch 2 click
Whats next?
- Hook up the remaining buttons to the ESP8266
- Solder all the wires and hide the whole thing in a case
- Power the IHC Wireless switch using the ESP8266. It currently uses an 3V CR2022 coin cell battery and the ESP8266 development board uses 3.3V so it should be possible
Enjoyed this content?
Help keep it free by sending a donation. You can also subscribe to various site feeds to get notified of new posts, follow me on social media, and more.