Latest stable LXD on Ubuntu 16.04 LTS

I have previously a small guide on how to get started with LXD 2.0 here. This however install LXD 2.0.5 and the current stable version is 2.6.2 at the time of writing. The whole setup is on a KVM VPS at RamNode. Notice that OpenVZ VPS does not support LXD as the kernel is too old.
Installation of LXD host
Lets add a repository to the newest stable LXD.
$sudo add-apt-repository ppa:ubuntu-lxc/lxd-stable
 This PPA contains the latest stable release of LXD as well as the latest stable version of any of its dependencies.
 More info: https://launchpad.net/~ubuntu-lxc/+archive/ubuntu/lxd-stable
Press [ENTER] to continue or ctrl-c or cancel adding it

gpg: keyring `/tmp/tmp9eaz0v8s/secring.gpg' created
gpg: keyring `/tmp/tmp9eaz0v8s/pubring.gpg' created
gpg: requesting key 7635B973 from hkp server keycenter.ubuntu.com
gpg: /tmp/tmp9eaz0v8s/trustdb.gpg: trustdb created
gpg: key 7635B973: public key "Launchpad PPA for Ubuntu LXC team" imported
gpg: Total number processed: 1
gpg:               imported: 1  (RSA: 1)
OK
We then update and upgrade to get the latest stable version of LXD.
$sudo apt-get update
$sudo apt-get dist-upgrade
LXD should already be installed on Ubuntu 16.04.1, but if not execute the following. You can skip zfsutils-linux if you will not use ZFS.
$sudo apt-get install lxd zfsutils-linuxNow everything is handled in the LXD configuration, even the LXD bridge. Replace somepassword with your own password. I choose only to have an IPv4 network, not IPv6. Replace /dev/vda3 with your own device / partition for the ZFS storage.
Warning! Notice that I create a new ZFS pool that wipes the chosen partition / device. Choose dir as the storage backend or a ZFS loop device (answer no to "Would you like to use an existing block device (yes/no)?") if you do not wish to wipe a partition / device and to prevent accidental data loss.
$sudo lxd init
Name of the storage backend to use (dir or zfs) [default=zfs]:
Create a new ZFS pool (yes/no) [default=yes]?
Name of the new ZFS pool [default=lxd]:
Would you like to use an existing block device (yes/no) [default=no]? yes
Path to the existing block device: /dev/vda3
Would you like LXD to be available over the network (yes/no) [default=no]? yes
Address to bind LXD to (not including port) [default=all]:
Port to bind LXD to [default=8443]:
Trust password for new clients: somepassword
Again: somepassword
Would you like stale cached images to be updated automatically (yes/no) [default=yes]?
Do you want to configure the LXD bridge (yes/no) [default=yes]?
What should the new bridge be called [default=lxdbr0]?
What IPv4 subnet should be used (CIDR notation, ◼auto◼ or ◼none◼) [default=auto]? 10.0.0.1/24
Would you like LXD to NAT IPv4 traffic on your bridge? [default=yes]?
What IPv6 subnet should be used (CIDR notation, ◼auto◼ or ◼none◼) [default=auto]? none
LXD has been successfully configured.
We confirm the ZFS pool has been created
$sudo zpool list lxd
NAME   SIZE  ALLOC   FREE  EXPANDSZ   FRAG    CAP  DEDUP  HEALTH  ALTROOT
lxd   6.81G    90K  6.81G         -     0%     0%  1.00x  ONLINE  -
Setup a container
Lets create an Ubuntu container
$lxc launch ubuntu: test-containerAfter it is done we confirm that the container is running
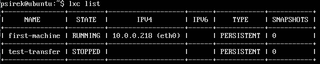
$lxc list
    +-----------------+---------+------------------------+------+------------+-----------+
    |      NAME       |  STATE  |          IPV4          | IPV6 |    TYPE    | SNAPSHOTS |
    +-----------------+---------+------------------------+------+------------+-----------+
    | test-container  | RUNNING |  10.0.0.218 (eth0)     |      | PERSISTENT | 0         |
    +-----------------+---------+------------------------+------+------------+-----------+
We can now enter the container
$lxc exec test-container bashWhich will enter the container as root. Here we can as an example setup NGINX
root@test-container:~#apt-get install nginxThen exit the container
root@test-container:~#exitWhich drops us back to the host. Here we can now access the webserver we just installed on the container
$wget http://10.0.0.218
--2016-10-22 23:20:15--  http://10.0.0.228/
Connecting to 10.0.0.228:80... connected.
HTTP request sent, awaiting response... 200 OK
Length: 632 [text/html]
Saving to: ◼index.html◼

index.html           100%[==============================>]      632   --.-KB/s

2016-10-22 23:20:16 (41.0 MB/s) - ◼index.html◼ saved [632/632]
Lastly I wanted a static ip address for my containers. This is now very easy using LXD 2.3 or higher.
$lxc stop test-container
$lxc network attach lxdbr0 test-container eth0
$lxc config device set test-container eth0 ipv4.address 10.0.0.7
$lxc start test-container
$lxc list
    +-----------------+---------+------------------------+------+------------+-----------+
    |      NAME       |  STATE  |          IPV4          | IPV6 |    TYPE    | SNAPSHOTS |
    +-----------------+---------+------------------------+------+------------+-----------+
    | test-container  | RUNNING |    10.0.0.7 (eth0)     |      | PERSISTENT | 0         |
    +-----------------+---------+------------------------+------+------------+-----------+