Free email forward with Mailgun.com


I recently started moving away from my Danish Domain and DNS provider GratisDNS which charges me about $7.5 per year just for an email forward service which I use to be able to send and receive emails as serek.eu from my gmail account. This can be done for free using Mailgun.com! This includes unlimited incoming mails and 10.000 outgoing mails per month which is more than enough for my needs.
This guide shows how to
- Forward incoming emails to any email address using you own domain (e.g.
user@example.com–>user@gmail.com) - Send emails from gmail as
user@example.com
Replace example.com and all emails with your own.
Initial setup
- Create an account at Mailgun.com.
- Login to Mailgun.com and click
Add new domainunderDomains. Ignore the recommendation to use a subdomain, just add your base domain, e.g.example.com. - After adding the domain successfully you will be shown a
Now Follow These Steps To Verify Your Domainpage. Follow the instructions to add the two TXT records, two MX records and the CNAME entry to your DNS settings. Remember to remove existing MX settings for the chosen domain that to prevent conflicts. - Confirm that the DNS works by going to
Domains–> Click on your domain –> ClickDomain Verification & DNSand lastly clickCheck DNS Records Now. It might take a day or two for everything to confirm depending on your existing DNS / TTL settings.
Setup incoming emails
- In Mailgun.com go to
Routesand clickCreate route - Configure a mail forward as follows:
- Expression Type –>
Match recipient - Recipient –>
user@example.com - Action –> Check
Forwardand enter the email to forward to, e.g.user@gmail.com - Priority –> Set to
10 - Description –> Add the same as in
Recipient - Click
Create route
- Expression Type –>
- Repeat step 2 for each email forward you want.
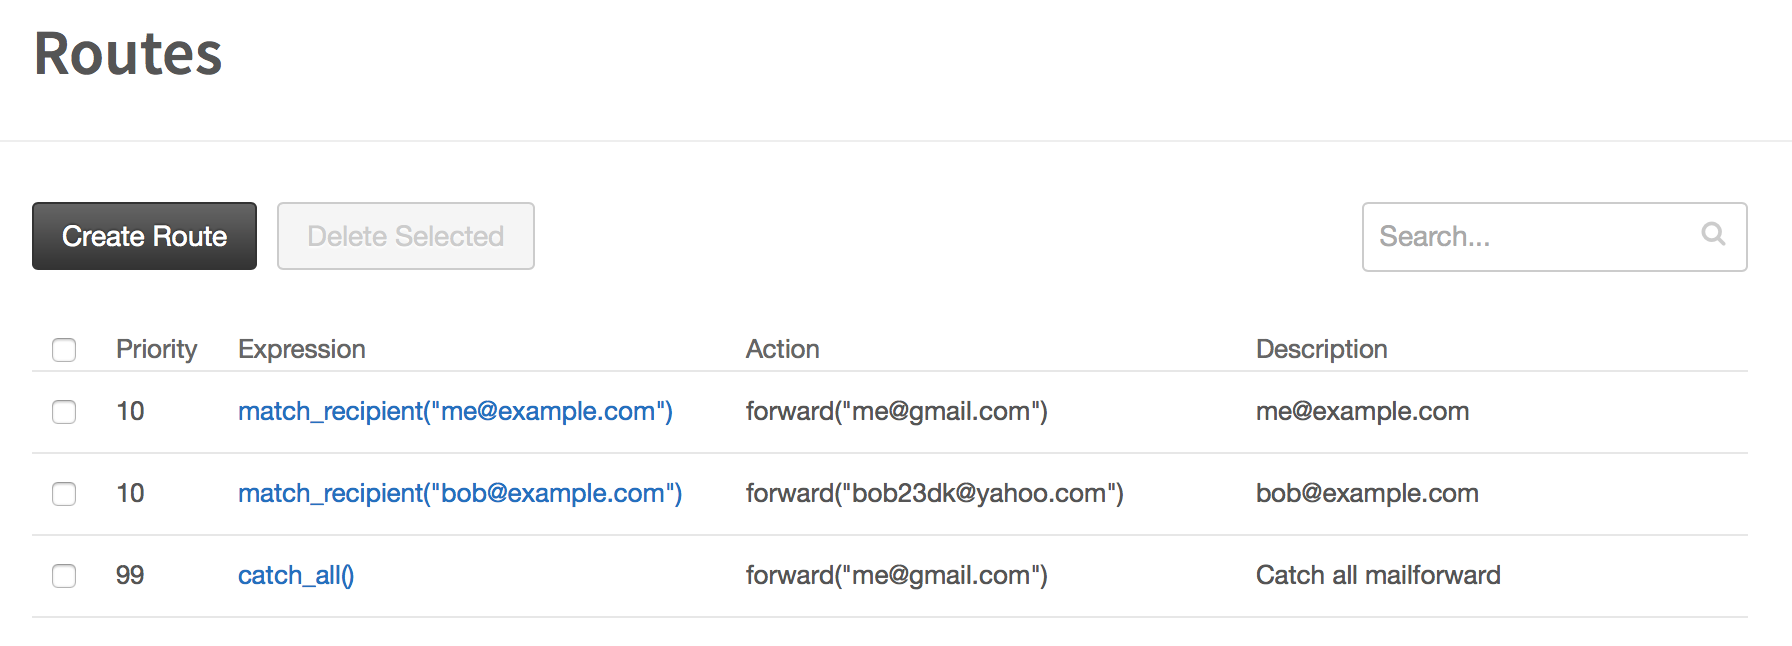
- (Optional) Create a route to catch every mail not caught using
Match recipient. This will ensure that every possible recipient using@example.comwill be caught and forwarded.- Expression Type –>
Catch All - Action –> Check
Forwardand enter the email to forward to, e.g.user@gmail.com - Priority –> Set to
99 - Description –>
Catch all mailforward - Click
Create route
- Expression Type –>
Thats it, you can now receive emails on @example.com.
Setup outgoing emails
- Log into gmail
- Go to
Settings–>Accounts and Import - Go to section
Send mail asand clickAdd another email address that you own - Enter an
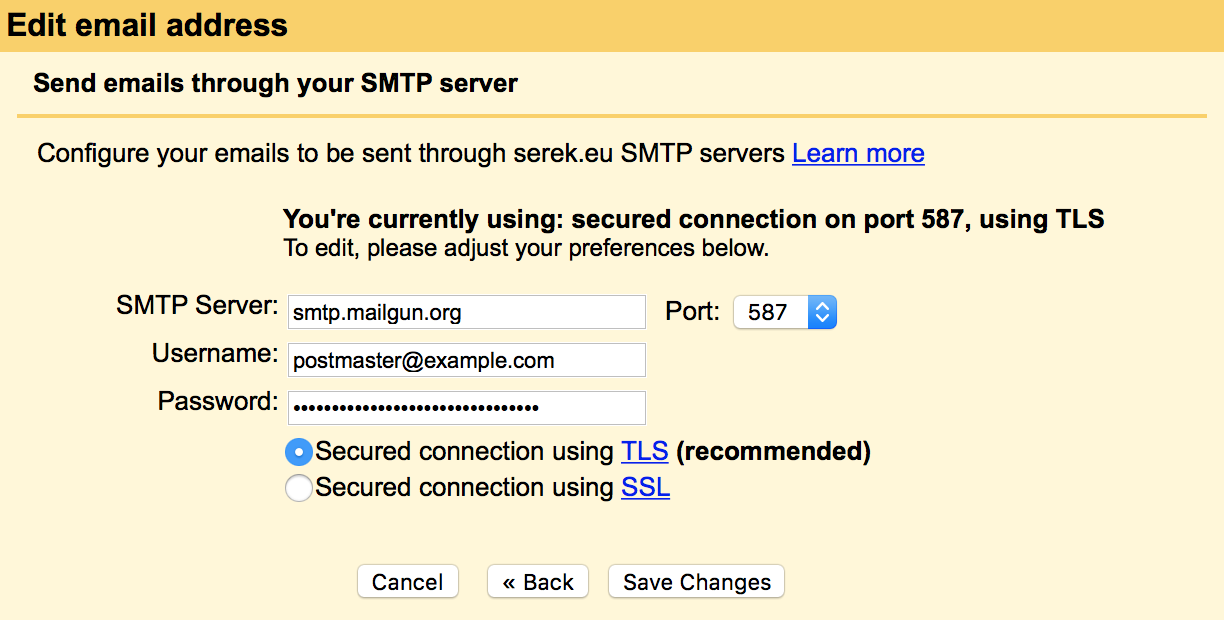
@example.comemail address and clickNext Step - Configure the form with information from Mailgun.com –>
Domains–>example.com- SMTP Server –>
SMTP Hostnamefrom Mailgun - Port –>
587 - Username –>
Default SMTP Loginfrom Mailgun - Password –>
Default Passwordfrom Mailgun - Check
Secured connection using TLS - Click
Save Changes
- SMTP Server –>
- Repeat step 3 - 5 for each email you would like to be able to send as
- Go back to
Settings–>Accounts and Import–>Send mail as. Choose which email is the default to use when sending mails and which email to use when replying
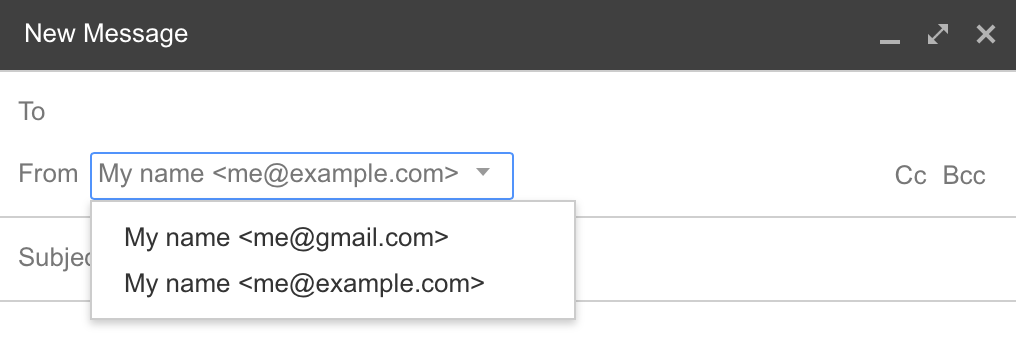
Thats it! When composing a new email from gmail you now get a dropdownlist in the From field where you can choose who to send as.